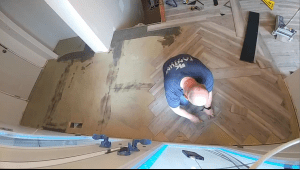
Herringbone Vinyl Flooring: 6 Things to Know Before Installation
Laying herringbone vinyl flooring can be intimidating at some point, especially if you’re doing the project on your own. Installing herringbone flooring can turn out badly if grout and cuts are done improperly. For those who love DIY flooring projects, perfection is hardly ever attainable, though.
Firstly, bear in mind you can’t start in a corner. This may lead to miscalculations. Working on herringbone pattern flooring requires taking care of inconsistencies in the grout through the use of spacers, although imperfections can improve the looks of the floor when they are not out of control.
You can use herringbone vinyl flooring to cover an underfloor of another color. Do you have an orange or grey floor, which you find difficult to hide? Maybe, a herringbone vinyl floor can fulfill this purpose. And further, it will make your room classy.
There are various methods to lay down V-pattern vinyl flooring. In this article, you’ll learn some tips before a herringbone flooring installation. Keep reading to find out more.
Get rid of your old herringbone vinyl flooring
If you had a vinyl floor, get rid of it before starting. Fetch a mop, a vacuum cleaner, a room, and a knife to scratch it away and clean. It is very important that no debris remains on the floor before starting the new flooring. Once you start tiling the floor, you will not be able to remove broken tiny blocks.
Do so mainly if the flooring pattern you want to layout is completely different. Anyway, removing the vinyl floor laminate is always easy. You can remove each laminate by hand, and the laminate pieces can be reutilized.
Not all the old pieces are useless. The old wedges that are still in good condition can be given to someone who needs them for sure.
Do the mopping
Do the moping once you break out your old floor. Also, sweep the floor and do the vacuuming. Do this over and over again if possible. Also, whenever you clean the debris, use gloves to protect your hands when scratching the floor.
Check the level
Check if the floor is sufficiently flat with a long level and a square. If it is irregular, you have to level it first. A maximum clearance of five millimeters over three meters is acceptable. Make a rough estimate of the space by measuring the surface. Now you know how many planks of vinyl you need.
Decide where to start the herringbone vinyl flooring work
You have several options to start, but this will depend on your flooring and space. If the floor is not leveled and uneven, and the room’s shape is tricky, put the first tiles in the middle to kick off.

Consider herringbone vinyl flooring planks can be hard to adapt to room shapes. Act wisely and pay attention to details when deciding where to start.
Laying the first herringbone vinyl planks from the center can make it easy to custom herringbone vinyl plans that are against the wall. The triangles installed against the wall do not need to be perfect.
Acclimatize
Acclimatizing the planks is a good idea before starting, however, not all planks should be done so. Acclimatization is known as the process in which the vinyl pieces are left in the room for hours, so they can acclimatize to the temperature. Nonetheless, if you are going to use plastic vinyl flooring, it is unnecessary.

Do so with wooden planks. It makes little sense to leave plastic vinyl tiles in the room for hours for them to acclimatize. But if they are made of wood, get them out of the box, let them rest, and just be careful not to mix them up. Wait 48 hours.
Now if you happen to mess them up, check out the prints on their backside.
After this, go buy an appropriate underlay and cover the floor with it.
Use herringbone pattern molds
Get a mold to make the triangles and use a utility knife to cut. Cutting the triangles is much simpler with a mold. Big triangles do not look fine in places that are small, so choose a mold based on the width and length of the place.

Use a mold and cut three left planks and two right planks to make wedges. Build as many triangles as you can, calculating they will cover the surface up.
To wrap up, installing herringbone flooring can help you give your room a vintage and trendy style. It is likewise a budget-friendly choice, allowing that each 6 x 24-inch piece can cost around $1.15. If the space to be covered is 15 meters in width and length, the cost should not exceed $300. Certainly, this is just an estimate, as prices vary from shop to shop.
Ideally, lay down whole pieces and avoid building the triangles on the flooring directly. This will help streamline the tiling work.


